20 gauge jewelry wire
Large (4 - 5mm) jump rings
26 gauge aluminum sheet metal ($5 at the hardware store)
Tin snips
A ruler or yardstick
Needlenose pliers
A nail
A hammer
A pen
A pencil
Alrighty, let's get started. First, you want to build your frame for the bira bira. Take your jewelry wire and cut off a length of it, about 10" - a foot. (You can see that my desk has become kanzashi central.)
Next, take your pencil and wrap the wire around it a few times.
Slide the coiled wire off the pencil and stretch out the coils a bit.
Now, flatten out your coils.
Right now, it looks pretty terrible. Don't worry, we're about to fix that! Take your needlenose pliers and begin working on the flattened coils, working them until they are all a uniform size and shape. This is going to take a while, so be patient and take your time with it.
After a while, you'll have a nice row of even coils. You may end up with more or less coils than you started out with, and that's okay. I ended up adding two or three new coils to mine by the time I was finished futzing with it.
Once you're satisfied with your coils, bend back the tails of your jewelry wire.
Bring your tails to the centre, and twist the wire together.
Your base is now finished! Now, on to the flutters.
Along the long side of your aluminum sheet, use your ruler and pen to mark a line about 1/4" from the edge. Don't worry, the pen will mark on the metal. This will be the width of your flutters. Then, within this narrow width, mark every 1 1/2 inches to mark the length of the flutters.
Cut out this strip with your tin snips.
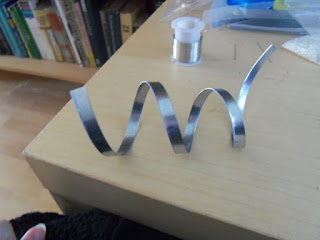
This next picture serves no purpose, except that I think the metal looks all cool curled up like it is.
Anyway, once you have the strip cut out lengthwise, go ahead and cut the flutters along the 1 1/2" markings.
You'll notice that your flutters have a bit of a curve to them. This is where your hammer comes in. You don't have to pound the daylights out of it to get it to lay flat, just a bit of tapping will do.
Once your flutters are laying flat, use the nail to punch holes in them at one end.
Now you can use your jump rings to attach your flutters to the coil you made earlier. I didn't have any jump rings on hand, so I just made loops of jewelry wire to attach them.
Now you're finished with the construction!
Now you need to attach it to a bunch of flowers. I usually like to attach my bira bira to a smaller cluster of about seven blossoms.
You'll want to place your coil slightly behind the flowers so the flutters will peek out from underneath without the rigging showing.
If you're having a bit of trouble getting it to sit right, it may help to curve the stem just slightly downward. Nothing dramatic, just so it sits nicely without crowding the flowers. Secure with a bit of hot glue, and voila!
Gallery:
These wonderful creations were made following my tutorial! :D I've provided links back to everyone's blog/site so you can visit the artists themselves. :)
From Eklipsnoire:
From The Motley Minx:


That is super-cool! Thanks for the tutorial!
ReplyDeleteThanks for the tutorial! :)
ReplyDeleteResults of my attempt on my blog soon: http://alacroiseedenosmondes.wordpress.com/
Regards,
Eklipsnoire
Thanks for the tutorial!
ReplyDeleteResults of my attemps soon on by blog:
http://alacroiseedenosmondes.wordpress.com/
Regards,
Eklipsnoire
Ooo, it looks great! I can't wait to see it combined with some kanzashi. :D Thank you for sharing!
Delete