 My first finished costume of the year! I'm so happy with how this dress turned out. I had found the fashion plate last fall, and it immediately jumped out at me - the layered overskirt with the graduated leaves, the colors, and, of course, that absolutely spectacular ruffled underskirt. I have always had a weakness for ruffled tiers on a skirt, they're just so eye catching and striking! Ever since my first ruffled skirt, I've been hooked.
I usually make my ruffled skirts with gathered ruffles, which is relatively quick and easy. It still takes quite a bit of time, but they can usually be finished over a couple of days.
But, the skirt in the fashion plate very clearly had pleated ruffles, not gathered ones, which meant I needed to dig out my pleating board and get to work! The back panel of the skirt was about 20 inches wide, which meant that the strip for each ruffle had to be 60 inches. It took days to cut everything out, hem each edge of the ruffle, and pleat each ruffle. In total, it took about 5 hours of work to make and attach one ruffle, so there is about 35 hours of work just in the back panel of the skirt alone! It was totally worth it in the end, but my back certainly wasn't happy about all the hunch over the ironing board.
For each ruffle, I had to work in about foot long sections because of the size of my pleating board. I sprayed the fabric with a mixture of vinegar and water, tucked the fabric into the pleating board, and pressed it until all the fabric was dry. Once it cooled, I pinned the pleats in place so they would be easier to wrangle.
This created a pleated pin monster. After pleating each ruffle, I would pin it to the skirt and sew it in place along the top edge.
It took almost two weeks to finish the underskirt alone, but once it was finished it really did look pretty great!
For the overskirt, I pretty much just wung it. (Is that even a word?) First, I cut a piece of fabric to the length needed, and then I eyeballed the shape based off of the ones in the plate. I used the first one cut as a template for the rest of them, adding 5 inches of length each time to account for the length of the skirt toward the train.
I then layered them from back to front, so the shortest panel was at the center front. I used a few pleats at the top edge to make sure that the panels would lay smoothly.
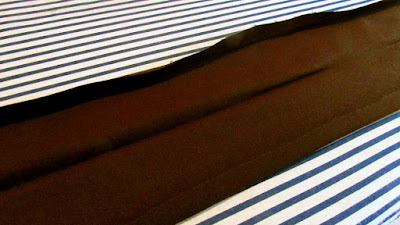
I added trim to the hemline by making wide tape. I ironed a 6-inche wide piece of the brown fabric in the middle, and then ironed down the seam allowances. I made sure that one side of the tape was slightly shorter than the other so that when I stitched things down from the top, it would be sure to catch both sides of the tape.
I didn't really feel like drafting anything ,so for the bodice I ended up using Burda 7880, which had almost exactly the same shape as the bodice in the fashion plate.
I especially love the box pleated peplum!
I used the pattern to make some brown trim for the front instead of using the lace and ribbon edging that the pattern recommends, so that it would match the plate. I also had to add brown trim to the sleeves, bound the bottom with a wide band of the brown, and I cut out the sleeve bands and collar in the brown fabric, as well.
The Burda pattern produced really beautiful results, but I definitely wouldn't recommend it for beginners. The instructions were minimal, at best, and it definitely presupposes a certain amount of sewing knowledge coming into the project. Nowhere in the pattern did it ever mention cutting out a lining, even in the cutting layout. It's not even written on the pattern pieces. But, in the instructions, there's a vague little note that says "assemble inside jacket as outside", the "inside jacket" meaning lining. The pattern just assumes that you'll automatically know to cut lining.
There also isn't a size chart on the pattern envelope. It says it is printed on the pattern tissue, but that doesn't help you if you don't know what size to buy. They do have a PDF on the website of their size chart, but it's an unnecessary extra step to have to go online just to figure out what size you are.
There are also other small quirks that are problematic. For example, they have a picture diagram of what notions you'll need, but it's not totally helpful. For instance, it shows a picture of a button with "x24" next to it, but it doesn't tell you what size buttons you need. I ended up using 3/4" coverable buttons, and only needed 19 for my bodice, so they must have intended to use a much smaller size.
Despite all of this, the pattern is very easy to put together, and the bodice itself is beautiful. I'm super happy with how this entire project came out, and I'm looking forward to using the Burda pattern again! There are a few small things that I want to add to complete the outfit - I didn't have time to add the narrow line of trim on the overskirt panels and on the bodice, and I didn't have any lace on hand to add to the collar and cuff edges. I also think I need to make one of those bustles with the train support in the back, to give the train a bit more oomph. I'll be sure to have those added by the next time I wear the outfit, though! :)


What a beautiful re-creation of a fashion plate! I love seeing how it all came together.
ReplyDeleteThank you!
DeleteWhat a stunning gown! I truly appreciate your notes on the Burda pattern as I have been looking at purchasing it. It was a pleasure attending your Rocco fashion event this past Thursday. You are a wonderful teacher. ~ Laura Ingalls Gunn
ReplyDeleteThank you! I'm so glad you enjoyed the talk, I was so nervous so it's great to hear that the audience enjoyed it! :D
Delete